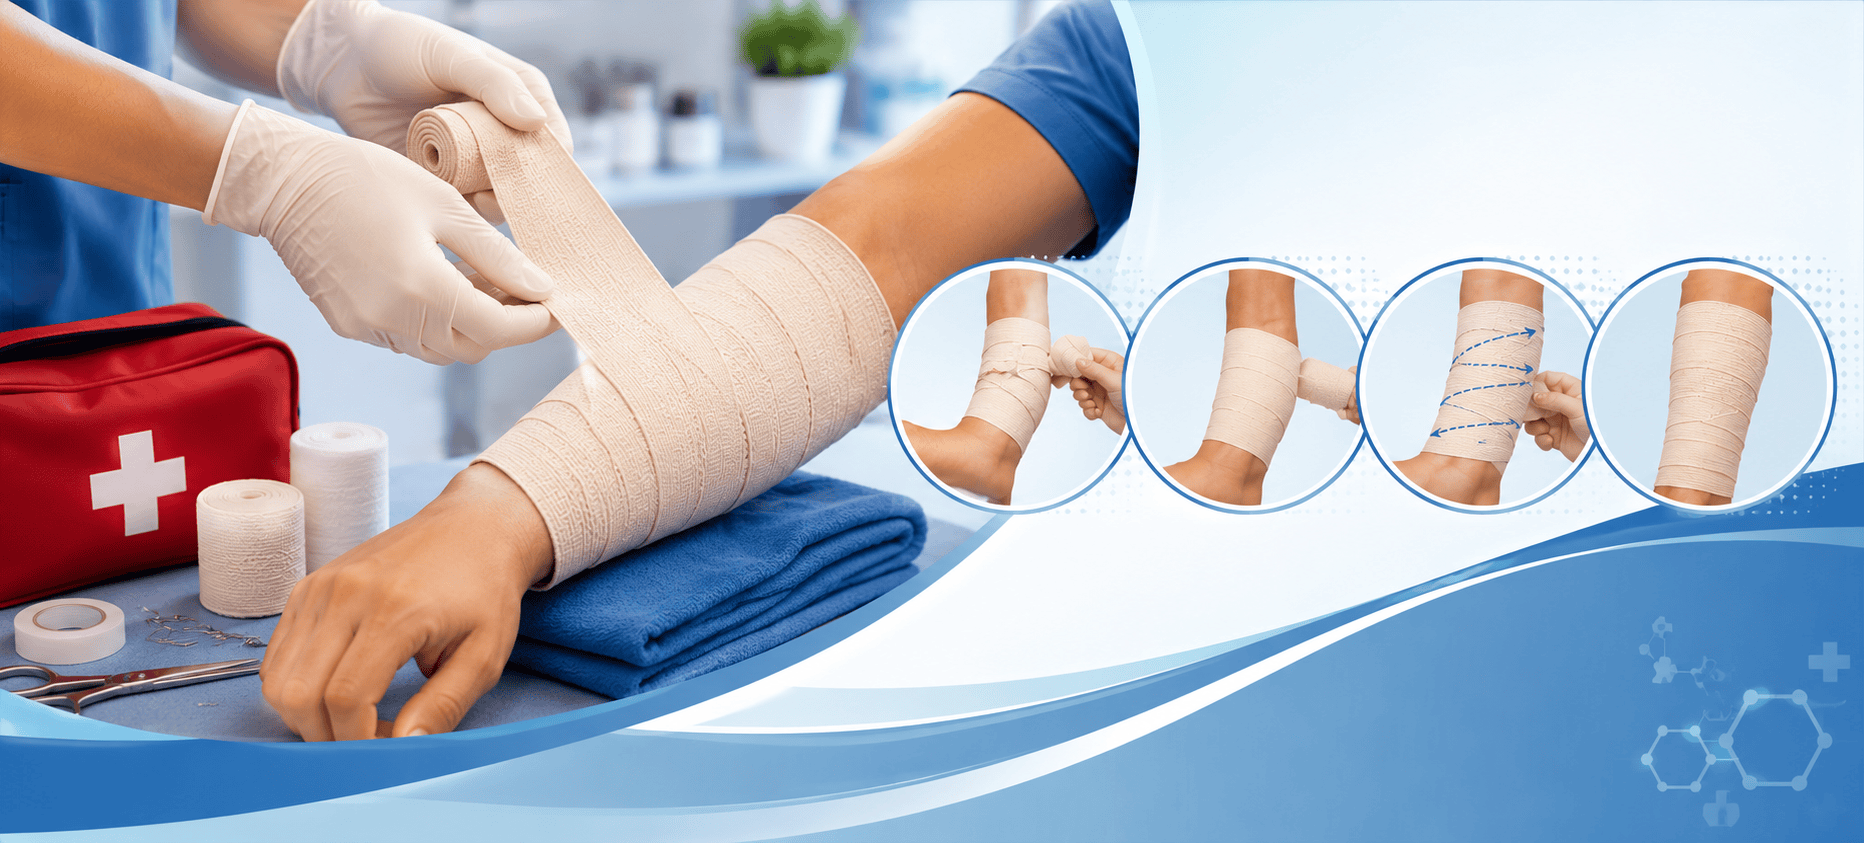
Learn the spiral pattern using roller bandage in first aid: purpose, step-by-step procedure, when to use simple vs reverse spiral, and essential circulation checks for safe bandaging.
At a Glance
- For limbs of uniform or increasing thickness
- Each turn overlaps 2/3 of the previous
- Always check circulation after application
Introduction to Spiral Bandaging
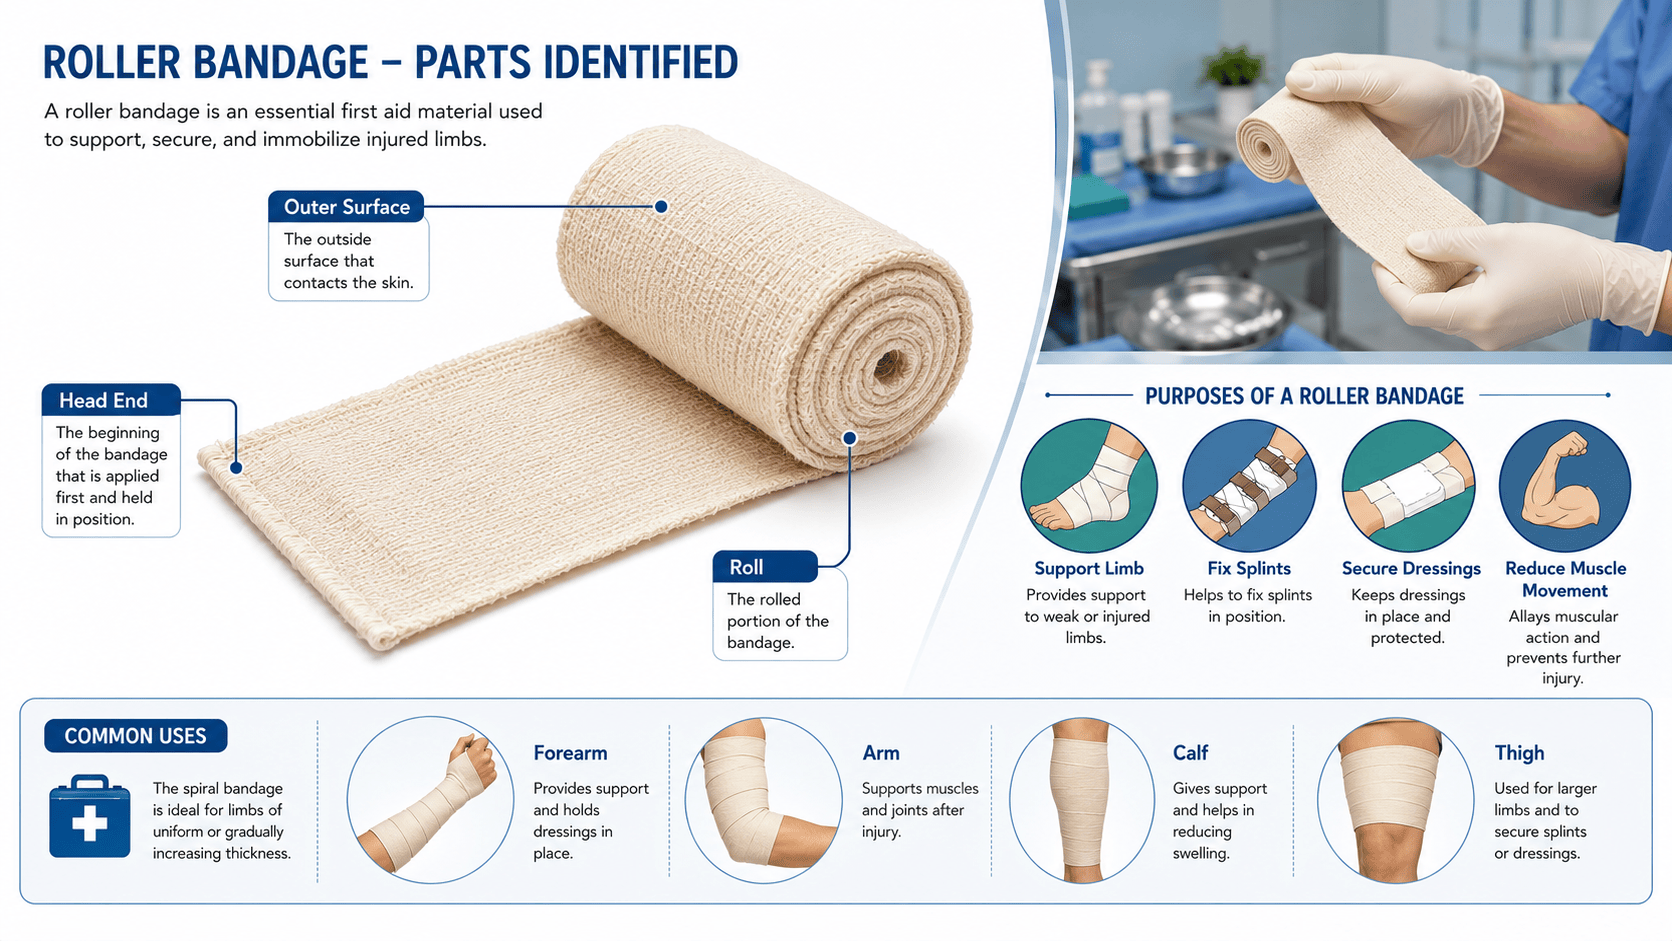
The spiral pattern using roller bandage is one of the three primary methods of applying a roller bandage in first aid, alongside the figure-of-eight and reverse spiral techniques. The spiral method is used when the limb is of uniform thickness or when it increases gradually in girth, making it ideal for the forearm, arm, calf, or thigh. A roller bandage is typically composed of linen, calico, flannel, or elasticated material, with widths ranging from one to three inches for smaller limbs and four to six inches for the thigh. The primary purposes of a roller bandage include giving support to a limb, fixing splints and dressings in place, and allaying muscular action. This foundational first aid skill is essential for anyone providing initial care in emergency or home settings.
Purpose of Spiral Bandaging
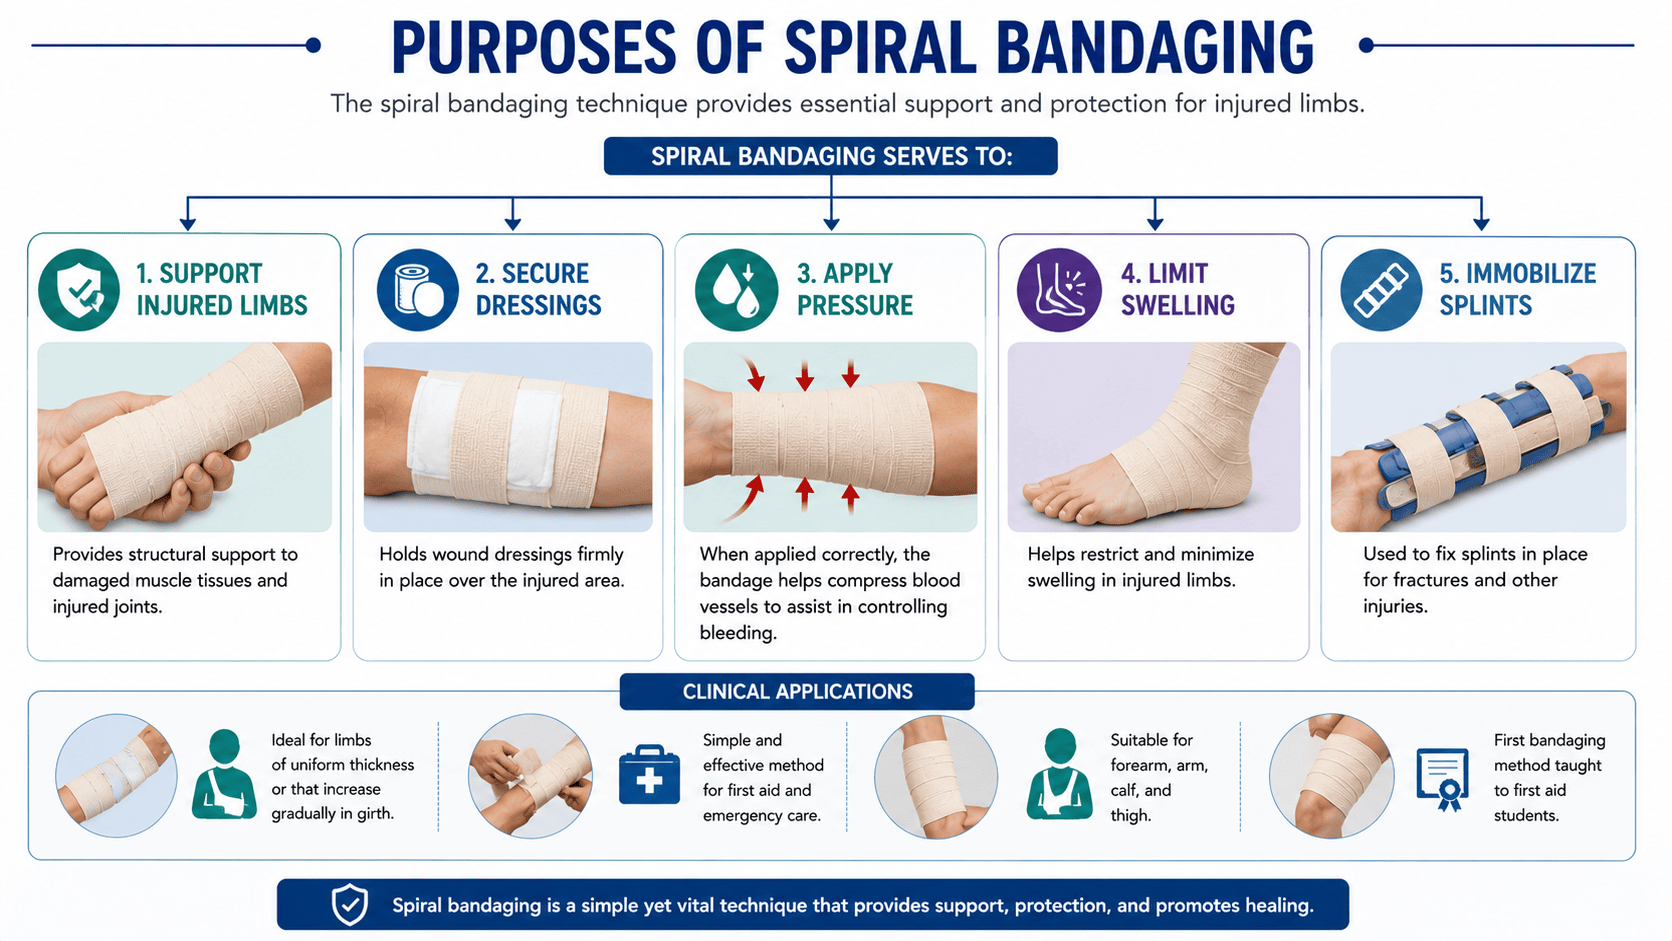
The spiral bandaging technique serves several critical purposes in first aid and patient care:
Support Injured Limbs – Provides structural support to damaged muscle tissues and injured joints.
Secure Dressings – Holds wound dressings firmly in place over the injured area.
Apply Pressure – When applied correctly, the bandage helps compress blood vessels to assist in controlling bleeding.
Limit Swelling – Helps restrict and minimize swelling in injured limbs.
Immobilize Splints – Used to fix splints in place for fractures and other injuries.
The spiral technique is particularly valued for its simplicity and effectiveness on limbs where the thickness does not change rapidly. It is the first bandaging method taught to first aid students because of its straightforward application.
When to Use Simple Spiral vs Reverse Spiral
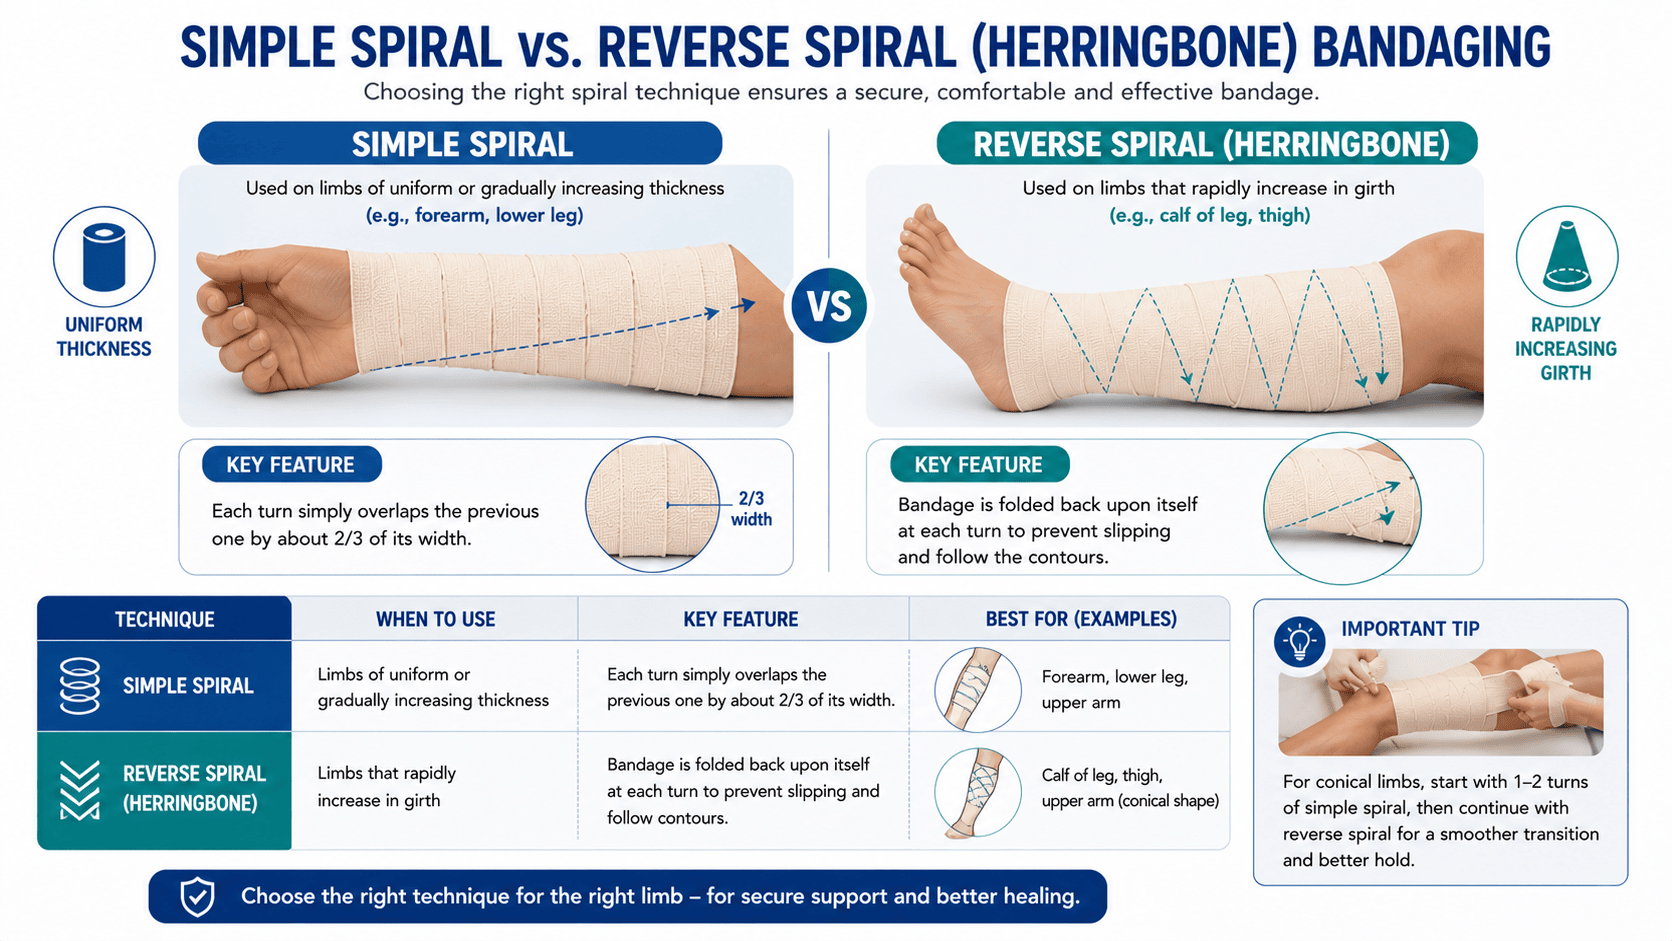
Understanding the difference between the simple spiral and the reverse spiral (also called herringbone) is crucial for effective bandaging:
| Technique | When to Use | Key Feature |
| Simple Spiral | Limbs of uniform or gradually increasing thickness (forearm, lower leg) | Each turn simply overlaps the previous one by about 2/3 of its width |
| Reverse Spiral | Limbs that rapidly increase in girth (calf of leg, thigh) | Bandage is folded back upon itself at each turn to prevent slipping and follow contours |
The simple spiral is easier to apply and works well on cylindrical body parts. The reverse spiral is more effective on conical limbs where a simple spiral would leave gaps or slip. Some sources recommend starting with a few simple spiral turns before beginning the reverse spiral technique for a smoother transition.
Step-by-Step Procedure for Simple Spiral Bandage
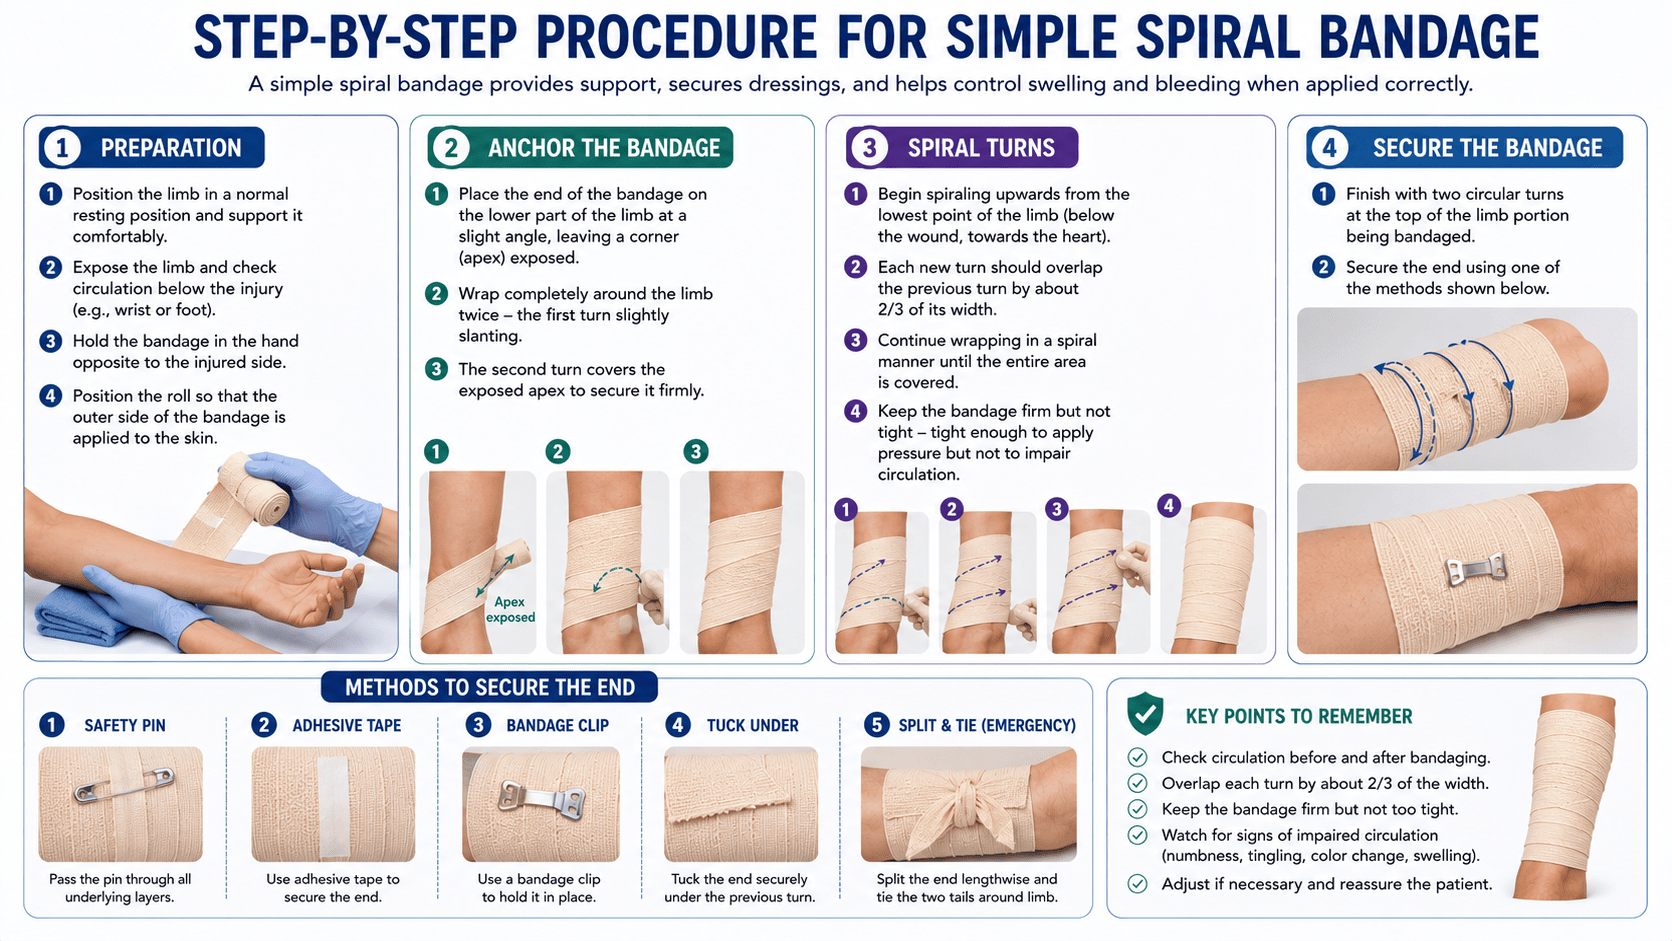
Step 1 – Preparation:
- Position the limb in a normal resting position (position of function) and support it comfortably.
- Expose the limb and check circulation at a point below the injury (e.g., wrist or foot) for baseline comparison.
- Hold the bandage in the hand opposite to the injured side – if injury is on the left limb, hold the bandage in your right hand.
- Position the roll so that the outer side of the bandage is applied to the skin.
Step 2 – Anchor the Bandage:
- Place the end of the bandage on the lower part of the limb at a slight angle, leaving a corner (apex) exposed.
- Wrap completely around the limb twice – the first turn slightly slanting, the second turn covering the exposed apex to secure it firmly.
Step 3 – Spiral Turns:
- Begin spiraling upwards from the lowest point of the limb (below the wound, working towards the heart).
- Each new turn should overlap the previous turn by about two-thirds of its width.
- Continue wrapping the limb in a spiral manner until the entire area is covered.
- Keep the bandage firm but not tight – tight enough to apply pressure but not to impair circulation.
Step 4 – Secure the Bandage:
- Finish with two circular turns at the top of the limb portion being bandaged.
- Secure the end using one of these methods:
- Safety pin (passed through all underlying layers)
- Adhesive tape or bandage clip
- Tucking the end securely under the previous turn
- Splitting the end lengthwise and tying the two tails around the limb (emergency method)
Step-by-Step Procedure for Reverse Spiral Bandage
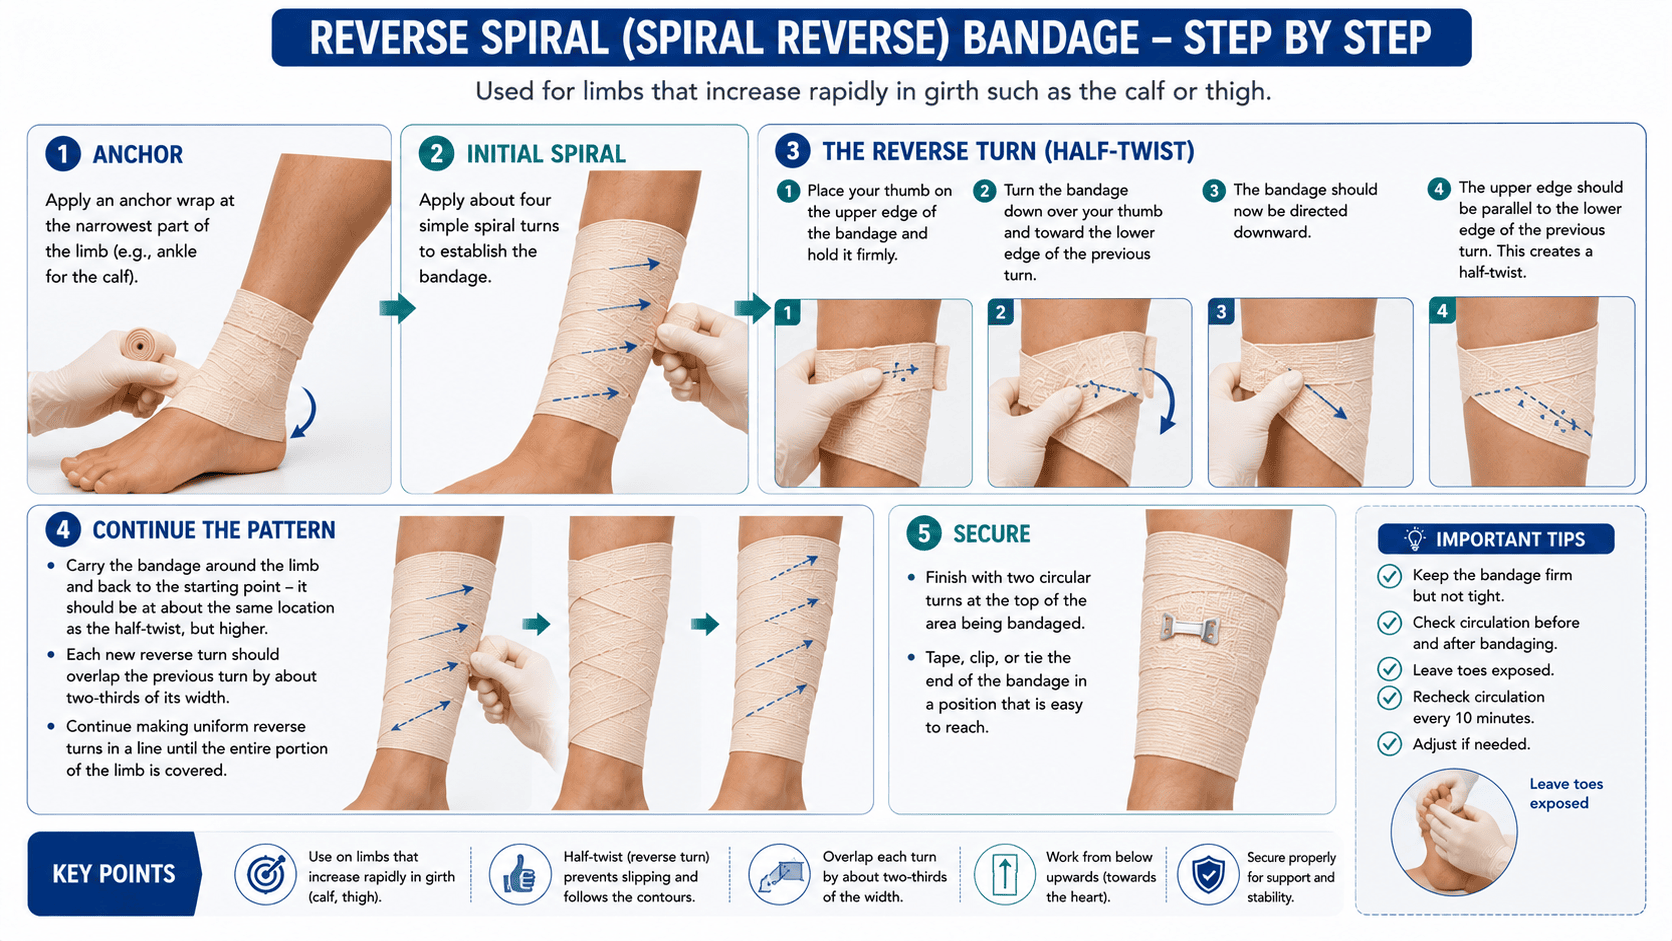
The reverse spiral (or spiral reverse) technique is used when the limb increases rapidly in girth:
Step 1 – Anchor:
Apply an anchor wrap at the narrowest part of the limb (e.g., ankle for the calf).
Step 2 – Initial Spiral:
Apply about four simple spiral turns to establish the bandage.
Step 3 – The Reverse Turn:
- Place your thumb on the upper edge of the bandage and hold it firmly.
- Turn the bandage down over your thumb and toward the lower edge of the previous turn.
- The bandage should now be directed downward and the upper edge should be parallel to the lower edge of the previous turn.
- This creates a half-twist in the bandage.
Step 4 – Continue the Pattern:
- Carry the bandage around the limb and back to the starting point – it should be at about the same location as the half-twist, but higher.
- Each new reverse turn should overlap the previous turn by about two-thirds of its width.
- Continue making uniform reverse turns in a line until the entire portion of the limb is covered.
Step 5 – Secure:
- Finish with two circular turns at the top of the area being bandaged.
- Tape, clip, or tie the end of the bandage in a position that is easy to reach.
Safety and Nursing Considerations
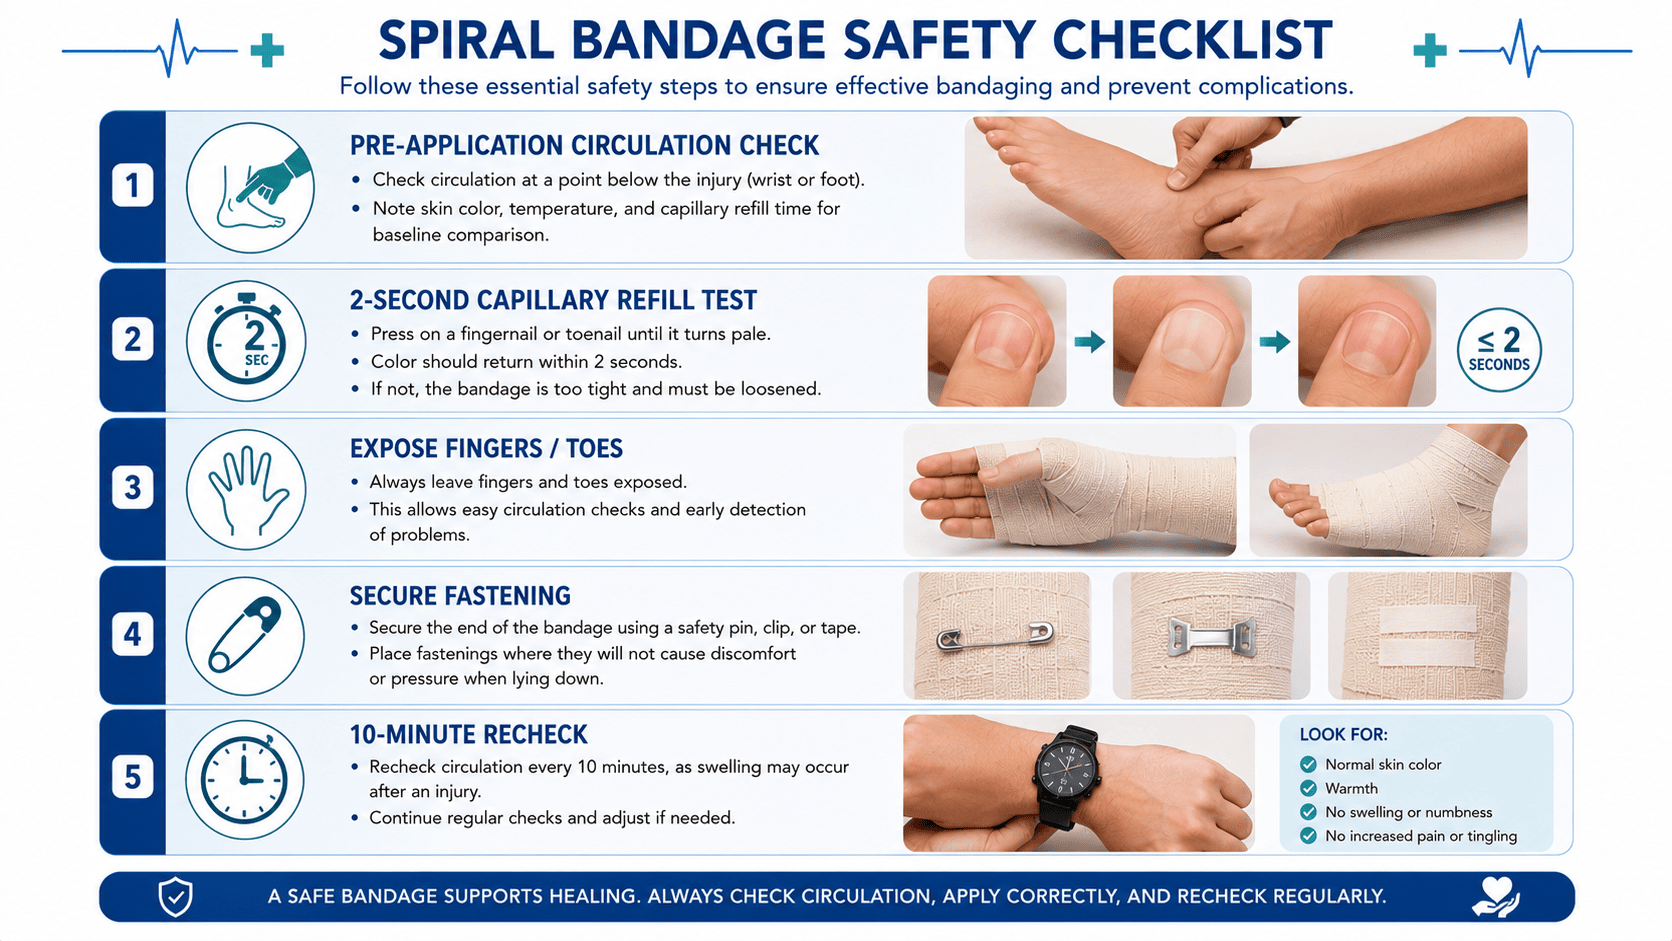
Proper bandaging requires careful attention to safety and circulation:
Circulation Checks – Critical Steps:
- Before applying: Check circulation at a point below the injury (wrist or foot).
- Immediately after applying: Press on a fingernail or toenail until it turns pale. The colour should return within 2 seconds – if not, the bandage is too tight and must be loosened.
- Every 10 minutes: Recheck circulation, as limbs can swell after an injury.
Key Bandaging Rules:
- Start below and work upwards (towards the heart).
- Work from the side of the injury, not leaning across the patient.
- Leave fingers and toes exposed to make circulation checks easy.
- Never bandage two skin surfaces together – separate them with gauze or cotton to prevent chafing.
- Apply the bandage firmly but not tightly – it should be snug enough to stay in place but never impair blood flow.
- Bandage parts in their accustomed position for comfort and function.
Fastening Considerations:
- Place safety pins and knots where they will not cause discomfort when lying on them.
- Avoid protruding fastenings that might be tampered with by children or irrational patients.
- For wet dressings, use safety pins rather than adhesive tape.
Conclusion
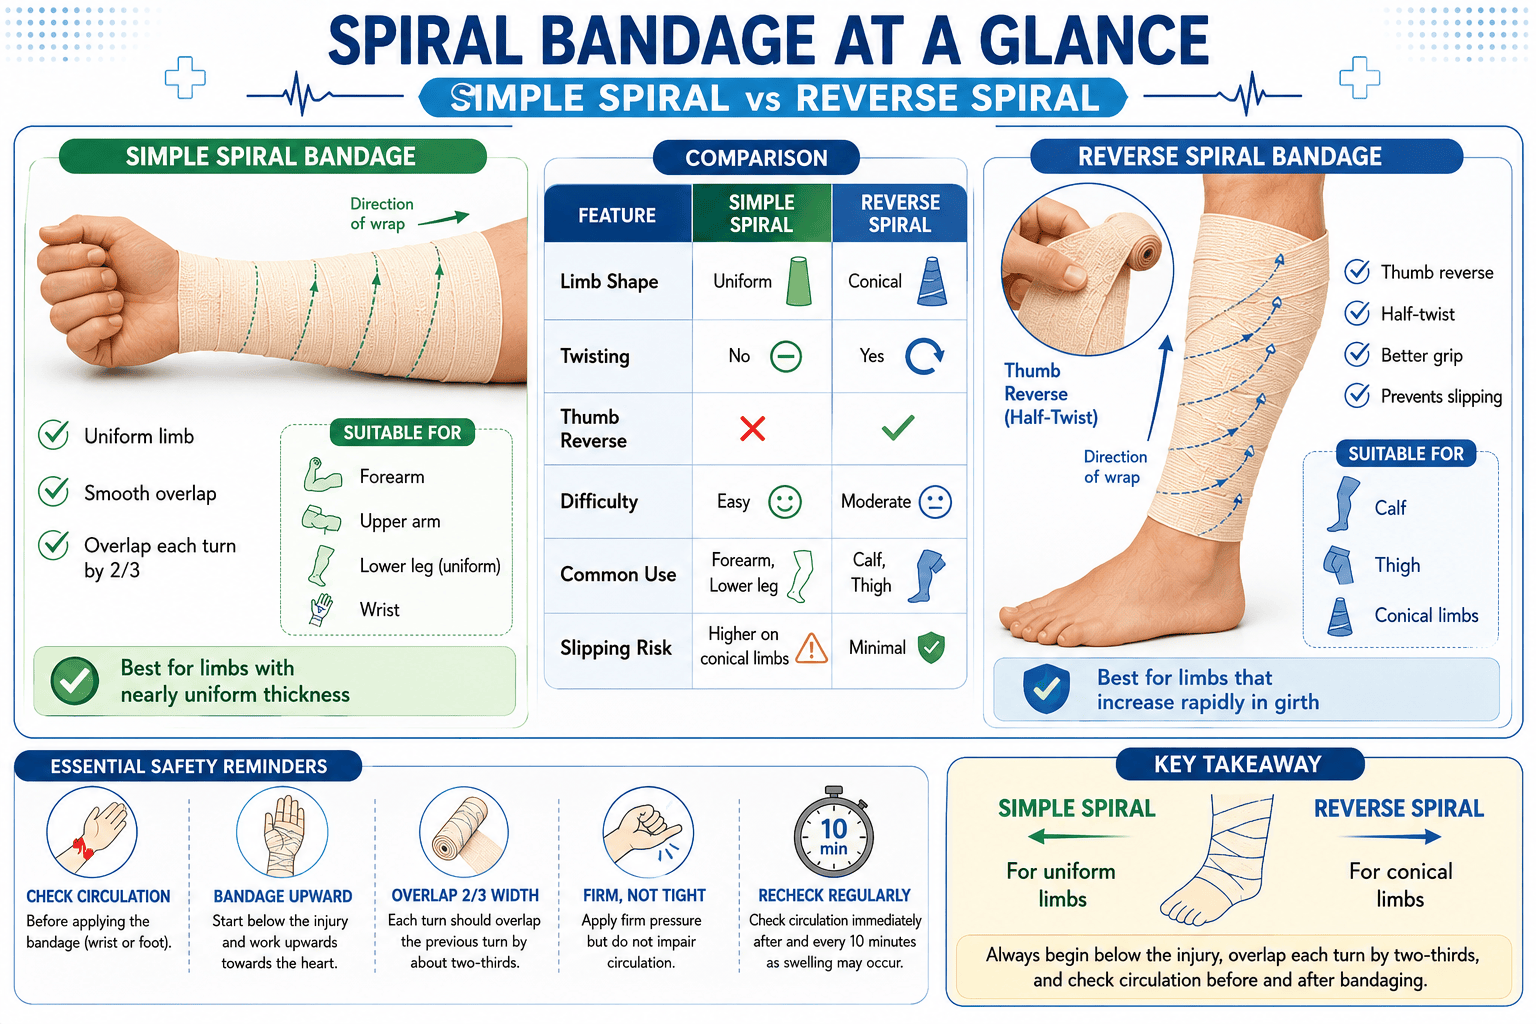
Mastering the spiral pattern using roller bandage is an essential first aid skill that can make a significant difference in emergency care. Whether applying a simple spiral to a forearm or a reverse spiral to a calf, the principles remain consistent: start below the injury, work upwards, overlap each turn by two-thirds, and always check circulation before and after application. With proper training and practice, anyone can learn this life-saving technique to provide effective support and comfort to injured individuals.
For more information about First Aid Spiral Pattern Using Roller Bandage Training, contact us